
Is DIY Shed Cheaper? Cost-Saving Tips Revealed in 2024
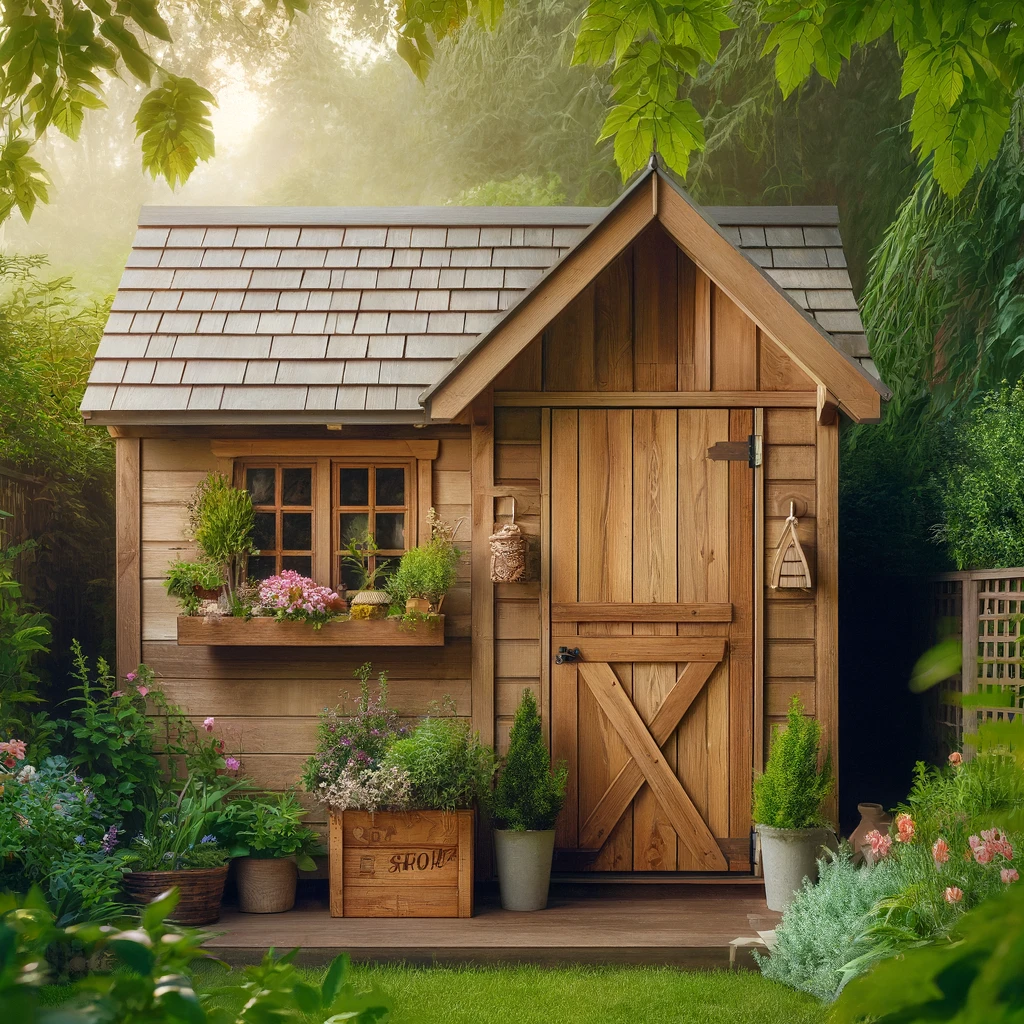
Building your own storage shed is a practical DIY project that enhances your backyard and boosts your storage capacity. The process begins by selecting high-quality lumber to construct a sturdy frame. Pay special attention to the joists, as they are critical for the structural integrity of your shed. Once the frame is up, you can proceed to shingle the roof, ensuring it’s watertight and durable against the elements. Throughout the shed build, from the foundational work to the finishing touches, every step offers a fulfilling blend of challenge and creativity, culminating in a functional and aesthetically pleasing storage solution.
Key Takeaways:
- Building a DIY shed may save you money compared to buying a pre-built shed.
- Consider factors such as material costs, permits, and your DIY skills.
- Proper planning, design, and acquiring affordable materials are vital for cost-effective construction.
- DIY shed construction allows for customization and creative use of salvaged materials.
- The total cost of a DIY shed can vary based on size, materials, and labor.
Planning and Design
It’s key to plan and design well when making a DIY shed without spending too much. Think about what you need your shed for and how you want it to look. We have some DIY shed building tips and design ideas to kickstart your project.
Determine the Ideal Size and Layout

Figure out what you’ll put in your shed and how much room it’ll need. Think beyond just what you have now to what you might add later. This ensures your shed will fit everything. Also, make a layout that makes it easy to use and get into.
Cost-Effective Construction Methods
Choose a simple roof that’s easy and cheap to make. Using common sizes for materials like plywood helps cut costs. It also makes less waste.
Incorporate Salvaged Materials

Make your shed stand out by using old materials like windows or doors. This not only saves money but also adds a special, unique look. Remember to clean up and prepare these materials well first.
“When designing your shed, think about how you can repurpose materials to add personality and save money.”
To make a great DIY shed, think about your needs, use money-saving methods, and add your personal style. With our DIY shed building tips and design ideas, you’ll have a shed that works well and looks good, all within your budget.
Is DIY Shed Cheaper?
Acquiring Materials
Starting a DIY shed means getting the right materials first. There are tips that can kickstart this process:
1. Pressure-Treated Lumber for Durability and Cost Savings
Choose pressure-treated lumber for your shed’s structure. It lasts longer because it’s treated to fight rot and bugs. This choice saves you money over time.
2. Reclaimed or Salvaged Materials for Siding, Roofing, and Finishing Touches
Using old materials makes your shed stand out and is budget-friendly. Look for old wood, windows, and doors in salvage yards or online.
3. Exploring Local Classifieds, Online Marketplaces, and Salvage Yards
Check out local ads, online stores, and salvage yards before buying new. You might find great deals or used materials that are affordable.
4. Having a Checklist of Basic Tools
Don’t forget the tools you’ll need. Put together a list of must-have tools like a hammer, screwdrivers, and a drill. Having these ready makes your project go smoothly.
Following these tips will help you find materials for your shed without spending too much. You can still make a high-quality, durable shed while saving money.
Preparing the Site
Before you start building your DIY shed, the site must be ready. This ensures a strong base for your shed and an easier build. Here are key tips to help:
Choose a flat spot with great drainage for the shed base. This stops water from gathering around it and causing harm.
Clear out any rubbish, rocks, or plants from the area. This keeps your work area safe and clean.
Think about using gravel or concrete blocks for the shed base. Gravel is cheap and stable. Blocks are also affordable, and they offer strength.
Always follow the area’s building rules about where you can build. Breaking these rules could cause problems later on.
Make sure you know where utility lines are before you dig. Hitting a line could be dangerous and costly. Call to have the lines located before you start.

Quote:
“Properly preparing the site is key to a shed that lasts. Pick a flat spot, clear it out, and follow local rules for a safe and strong shed.” – John Smith, DIY Enthusiast
Following these steps will kick-start your DIY shed success. Getting the site ready well will help you avoid issues and costs later. Next up, we’ll dig into the vital step of creating the shed’s foundation.
Building the Foundation
Building a shed starts with a strong foundation. This step boosts stability, making the shed last longer. You can choose from various cheap methods based on your budget and site.
For those who want to save money, consider using concrete blocks or treated lumber as piers. This method is affordable and stable. Another budget option is gravel. Even though it’s simple, it does the job of keeping water away from the shed.
When setting up the base, stick to the shed’s plans and check local rules. The right position and stability are key for your shed’s strength. Remember environmental factors like soil type and water flow. They affect how well the foundation lasts.
The foundation is the backbone of your shed. Investing time and effort into building a solid foundation will ensure that your shed stands the test of time.
Key Points:
- Cost-effective options for shed foundations include concrete blocks, pressure-treated lumber, and gravel.
- Concrete blocks and pressure-treated lumber can be used as piers, offering stability and support.
- Gravel is a budget-friendly option that provides adequate drainage for your shed.
- Follow the shed’s design and consult local building codes for proper placement and stability.
- Consider environmental factors such as soil composition and water drainage.
Constructing the Frame
The frame is key for your DIY shed’s strength. It needs to be made from strong materials. Options like pressure-treated lumber keep your budget in check while being reliable.
Accuracy is vital when building the frame. Everything must be square and level. This ensures your shed will be sturdy and last a long time.
Add cross-bracing or support beams for extra strength. This is great if your area gets a lot of wind or snow.
Benefits of Building the Frame Yourself
Building the frame yourself has many pluses. You control the build’s quality. Every detail is by your design, making it unique.
It also saves on labor costs. Hiring pros can be pricey. Doing it yourself means you can use that money elsewhere in your project.
Building the frame ourselves saved a lot of money. Plus, it was really rewarding. We were proud of our work.
Expert Tip: Seek Professional Guidance
If manual work isn’t your strong suit, ask for advice. Professionals can offer tips. And, using DIY guides can ensure your shed is safe and well-made.
Comparison: DIY vs. Professional Shed Installation
Decide on DIY or pro installation based on cost and personal goals. Doing it yourself is cheaper and fulfilling. But, pros offer expertise and a smooth process.
Here’s an overview to help you choose:
| Factors | DIY Shed Installation | Professional Shed Installation |
|---|---|---|
| Cost | Save a lot by doing it yourself, but need to buy tools and materials | Initial cost is higher due to professional labor |
| Time | Plan for time to build and gather supplies | Professionals work faster |
| Skills | Need to know basic carpentry and shed building | Pros have advanced skills |
| Quality | Your skill affects how well it turns out | Expect top-notch work from professionals |
| Customization | You can make it how you want | Options might be more limited |
Choose by considering what really matters to you: budget, skill, and taste. Think carefully before starting your shed project.
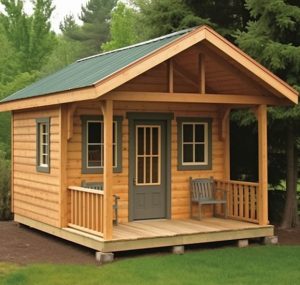
Check out some shed examples Here
Installing Roofing and Siding
When you build your own shed, picking the right roofing and siding is key. You want them to be strong and affordable. This way, you can save money without losing out on quality. Let’s look at some good choices.
1. Asphalt Shingles
Asphalt shingles are great for sheds. They’re budget-friendly and easy to put on. They protect well against the weather. You can match them to your shed’s look since they come in many colors and styles.
2. T1-11 Plywood or Oriented Strand Board (OSB)
T1-11 plywood or OSB are solid picks for shed siding. They’re affordable, sturdy, and give a neat finish. You can paint or stain them to suit your shed’s style.
3. Salvaged Materials or Repurposed Wood
Looking for something unique and cheap for your shed’s exterior? Using salvaged stuff or old wood is a cool idea. It saves money and makes your shed stand out. Search local spots or online for inexpensive old materials.
You can make a shed that’s good for your wallet by choosing budget-friendly roofing and siding. Go for quality over price, whether you pick asphalt, plywood, or reclaimed materials. A well-made shed will last for years.
| Material | Cost |
|---|---|
| Asphalt Shingles | $50-$150 per square |
| T1-11 Plywood | $30-$40 per 4’x8′ sheet |
| Oriented Strand Board (OSB) | $20-$30 per 4’x8′ sheet |
| Salvaged Materials | Varies – discounted prices |
Choosing affordable roofing and siding can cut your shed costs a lot. You can still end up with a shed that’s strong and looks good. Compare prices and check out different options to find what’s best for your project.
Adding Doors and Windows
Adding doors and windows to your DIY shed offers many affordable choices. Choosing the right ones can lower your costs. It also helps your shed look good and work well.
For doors, consider pre-hung exterior doors. They already have a frame, which makes putting them in easier. You’ll find many kinds of them that fit your shed’s style. Plus, they’re budget-friendly.
When thinking about windows, don’t forget about salvaged ones. They can save you money and add a unique touch. Try looking at places that sell used building materials or online. Giving these old windows a new home adds character to your shed.
“By choosing wisely, you can save on shed construction expenses while ensuring functionality and aesthetics.”
It’s key to pick doors and windows that don’t cost a lot. But, it’s also vital to think about saving energy. Good seals and weather-stripping can keep your shed warm or cool. This saves you money on energy bills.
Where you put your doors and windows is important, too. Place them to let in lots of natural light and fresh air. This makes your shed look great and feel comfortable.
If you’re not sure where to start, ask an expert. A pro or someone at a home improvement store can help. They know a lot and can guide you through the process.
Door and Window Placement Tips:
- Consider placing windows higher up to improve privacy while still letting light in.
- Having windows on opposite walls helps air flow, which cools or warms the shed.
- Put the door where it’s easy to reach and not blocked by anything.
By keeping these tips in mind and looking for good deals, you can add doors and windows to your shed easily. Your shed will work well and look nice. It’ll be a place you’re proud of.
Adding Final Touches
After building your DIY shed, it’s time to focus on the finishing touches. These details not only look good but also make your shed more useful. Let’s talk about a few ways to do this:
- Add exterior lighting: Solar-powered lights or motion sensors illuminate your shed’s area. This boosts visibility and adds security, too.
- Landscaping: Surround your shed with plants to merge it with nature. Choose easy-care shrubs or flowers for color without a lot of work.
- Window planter boxes: Put up boxes filled with flowers or herbs. They make your shed look charming and serve as a focal point.
These touches are budget-friendly. Being smart with choices and creative can keep your costs low. Let’s see how these details change your shed’s look.
“We added solar sconces and a flower bed, turning our shed into an appealing outdoor space. The geraniums in the window boxes bring it to life. These simple, low-cost steps made our shed the yard’s highlight.”- Jane Williams, DIY enthusiast
Transforming the Look – Before and After
Budget Breakdown
Building a DIY shed starts with figuring out the cost. This includes the shed’s size, the materials needed, and if you’ll pay someone to build it for you.
Average material costs for a shed sized 12′ x 16′ are between $7,500 and $9,000. This covers everything from the base to the roof and the windows.
Job costs with a contractor might go up to $9,000 – $12,000. Having a pro build it may save time and ensure quality.
These prices are rough estimates. They can change for many reasons, like where you live and what your project needs. It’s wise to shop around and get multiple quotes.
In the end, building your own shed can save a lot of money over buying one. But, you should think about the time and effort involved in DIY work.
| Expense | Estimated Cost |
|---|---|
| Materials | $7,500 – $9,000 |
| Contractor (optional) | $9,000 – $12,000 |
It’s key to make a real budget and plan your costs well for any building project. This helps you get the shed you want without overspending.

DIY vs Professional Shed Installation
When it comes to building a shed, you have two main options: doing it yourself or hiring a professional team. Both have their pros and cons. Let’s look at each to help you figure out what’s best for you.
Do It Yourself Shed Affordability
Doing the shed yourself can save money, especially if you’re good with DIY work. You also cut costs by not paying for professional labor. This makes the project less expensive.
D.I.Y. lets you pick the quality and features of your shed. You can make it match your style perfectly. This is great if you want something unique.
But, think about how skilled you are and how complex the shed is. Simple sheds are usually ok for D.I.Y. More complex ones might need a pro to be safe and strong.
DIY vs Professional Shed Installation
If you go pro, you save a lot of time. Pros work faster because they do it all the time. If you’re busy or not great at building, this could be a big plus.
Pros also know all the rules and can handle tricky designs. This means your shed will be up to standard and good quality.
Deciding between D.I.Y. and pro help depends on your skills, budget, and time. If you’re good with tools, have time, and want to save money, go for D.I.Y. But if you just want it done right without the stress, a pro might be best.
Think hard about what you really want and what you can do. Making the right choice is key to having a shed you’ll love.

Conclusion
Building a DIY shed saves money if you plan right, buy cheap materials, and have the skills. While it costs at first, you can save in the long term. Think about the costs and benefits to decide if it’s for you.
Starting a DIY shed means looking at the costs and seeing if it’s better than other options. Pre-built sheds might seem easy but are often more expensive. With a DIY shed, you can make it just right for you and not spend too much. Make sure to plan well, buy what you need, build strong, and finish it nicely to save money and get a good shed.
Building your shed needs a good plan, the right work, and your time and effort. It is key to know what you can do, what help you might need, and how hard the project is. If you’re not sure about doing it alone, getting expert help is an option, but it costs more.
Deciding to do a DIY shed is up to you, based on your budget and if you like doing DIY. Think about the money you can save, what you’re able to do, and what you prefer. Then, you can decide if you want to take on this DIY project, which can be rewarding.
FAQ
Is building a DIY shed cheaper than buying a pre-built one?
Building a shed yourself can be cheaper than buying one already made. You need to think about the cost of materials and your building skills. Remember, you might also need permits.
What are some cost-saving tips for DIY shed construction?
When building your shed on a budget, planning and design play a big role. Think about what you’ll use the shed for and how big it should be. You can save money by using old pieces or finding cheap materials from local sources or online.
How should I plan and design my DIY shed?
Start by deciding the shed’s purpose and size. Keep the design simple and the size standard to save money. You can make your shed special by using reclaimed materials. This not only saves money but also gives your shed a unique look.
How can I acquire materials for my DIY shed?
For materials, try to find used ones. Look in classifieds, online shops, or salvage yards. You might get a great deal on what you need.
What should I consider when preparing the site for my DIY shed?
Choose a flat spot with good drainage for your shed’s base. Make sure the site is clear of debris. You could use gravel or concrete blocks for the base layer. And don’t forget to check the local rules for where you can build.
What are my options for building the foundation of my DIY shed?
There are few good ways to build the shed’s foundation without spending too much. You could use concrete blocks, lumber, or just gravel. Make sure it’s set up right, following local rules and your shed’s plan.
How should I construct the frame of my DIY shed?
Frame your shed with good quality wood that’s been treated to resist damp. Make sure it’s set up tightly and evenly. Adding diagonal supports can make your shed stronger.
What are some cost-effective options for roofing and siding my DIY shed?
For the roof and walls, pick materials that are both strong and don’t cost too much, like asphalt shingles or T1-11 plywood. You can also use old or recycled materials. This keeps your project budget-friendly.
How can I add doors and windows to my DIY shed on a budget?
Look for cheap doors and windows, like those from second-hand shops. Fill in any gaps with weather stripping to keep your shed cozy. Placing them wisely helps light and fresh air get in.
What final touches can I add to my DIY shed?
Add lights outside, pretty plants, or flower boxes for the windows. Choose things like solar lights that won’t raise your energy bill. These small touches make your shed more pleasant and useful.
How much does it cost to build a DIY shed?
A DIY shed can cost anywhere from $7,500 to $9,000 for materials. This price will go up if you hire someone to build it. So, making it yourself can save you a lot of money.
Should I build a DIY shed or hire a professional installation service?
Building it yourself is cheaper but takes time and skill. Hiring someone costs more but the work is done for you. Think about your skills and how much time you have to decide.